Web Hooks
IVR Web Hook SurVo NetGet Custom Audio Prompts Post Call Action Agent Panel Lookup Distributor FormCall Initiation API
Click-to-Call Click-to-Find Me Click-to-Find Me List Click-to-Virtual Receptionist Click-to-Voice Mail Click-to-SurVo Click-to-IVR Click-to-AgentAdministration API
addonsbroadcastclicktoconference- attendee.add
- attendee.call
- attendee.details
- attendee.kick
- attendee.list
- attendee.mute
- attendee.remove
- attendee.unmute
- details
- list
- remove
- schedule
- add_number
- create
- delete
- delete_number
- delete_recorded_call
- empty
- get_findme_list
- get_phone_list
- get_recorded_calls_list
- update_list_settings
Custom IVR Audio Prompts
Introduction
Custom audio prompts allow you to dynamicaly choose which audio file to play in an IVR question when using a Click-to-SurVo or from an IVR Web Hook response. This gives you the power to create a single IVR with one or more questions using recorded audio files that you can change on the fly. You can even access audio files from other building blocks such as Find Me and hold music. For uploading recordings via API to be used with Custom Audio prompts, see the Recording Upload method
Configuring the IVR
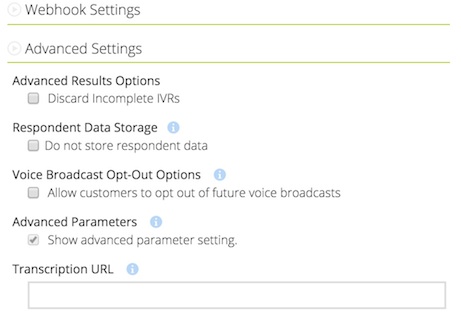
Start by clicking into "Settings --> Advanced Settings" with your IVR configuration.
Check the "Show Advanced parameter setting." checkbox under Advanced Parameters.
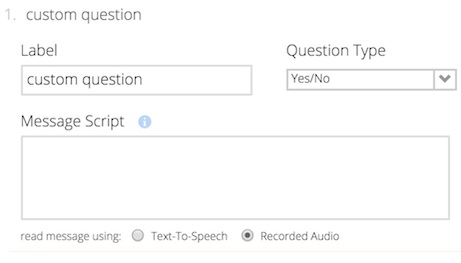
Click into the IVR question where you would like to include custom audio.
Select the button for "Recorded Audio" under the Message Script box.
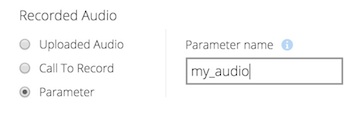
Off to the right select "Parameter" under the "Recorded Audio" section.
A new field will appear where you can name the parameter. The name you choose here is how you will reference it in your user parameters later. Any spaces in the name will be converted to underscores.
Using the New Parameter
Now that your IVR is configured to accept an audio parameter you can access any existing audio files in your account. To do so you pass in the name of the parameter and the path to the audio file in your user parameters. The path is made up of:
/building_block/building_block_ID/file_name
The building_block is one of the services you've uploaded audio to such as IVR or Find Me. The actual building block name to use in the path is in the table below.
| Building Block | Name for file path |
|---|---|
| SurVo or IVR | survey |
| Find Me | findme |
| Hold Music | holdmusic |
The building_block_id for the building block you are using can be found by selecting Developer Tools --> Building Block IDs.
Putting this all together if you have an audio file in an IVR with ID 1234 and is named "example.wav" the file path would be:
/survey/1234/example.wav
If you wanted to use an audio file you had previously uploaded to a Find Me with ID 45678:
/findme/45678/example2.wav
Using the example above where we named the parameter my_audio we can use this in the user_parameters of a Click-to-SurVo:
https://secure.ifbyphone.com/click_to_xyz.php
?app=cts
&phone_to_call=8475551212
&survo_id=890
&access_key=ACCESS_KEY
&secret_access_key=SECRET_ACCESS_KEY
&user_parameters=my_audio|/survey/1234/example.wav
Using the same example as a response to an IVR Web Hook:
<action>
<app>SurVo</app>
<parameters>
<id>75</id>
<user_parameters>
<my_audio>/survey/1234/example.wav</my_audio>
</user_parameters>
<p_t></p_t>
</parameters>
</action>
You can even use a recording made by a caller on an IVR using the unique respondent ID in the path. In this example 1234 is the IVR ID and 7781235 is the unique ID for the respondent. The wav file A1.wav is the recording made in question 1 of the IVR.
/survey/1234/7781235-A1.wav